
Begin by sketching a small oval for the flying squirrel’s head. Next, draw two slightly curved lines extending from the sides of the oval to form the animal’s arms. Now add two more lines coming down from the sides of the head to create the legs.
Finally, use a short, curved line to enclose a triangular shape at the base of each ear, and add a bushy tail by drawing a long, curved line that starts near the squirrel’s rear end and ends at a point.
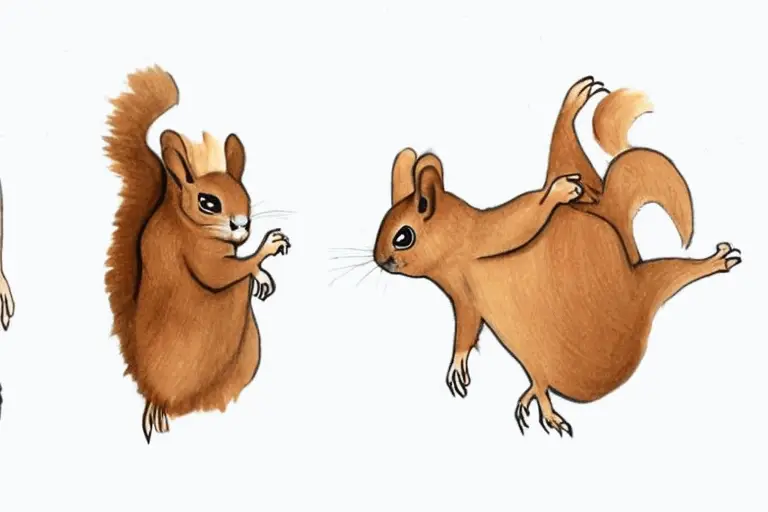
- Begin by drawing the head and face of the flying squirrel
- Add two small ears, and use a curved line to enclose the face
- Next, remove the body
- Extend a pair of curved lines from the head, meeting at a point at the bottom of the chest
- Then, extend two more teams of lines from the sides of the chest to form the legs
- Finally, add details to complete your drawing
- For instance, give your squirrel some furry texture by drawing short lines all over its body
- To finish off, pull a long tail that curves up over the back of your animal
How Do You Draw an Easy Squirrel?
Assuming you would like a tutorial on how to draw a squirrel, here are step-by-step instructions:
1. Begin by removing the head. Use a light pencil so that you can erase easily if needed.
Start with a small oval for the nose and add two circles for the eyes. Outline the face and ears.
2. Next, add details to the face, such as fur lines, whiskers, and wrinkles around the eyes.
Then begin working on the body by adding a rectangle for the torso and two small circles for the hands.
3. For the legs, start with two long cylinders coming down from the body, followed by smaller ones for each toe. Finally, give your squirrel a fluffy tail by drawing a curved line from its backside.
4. Once you’re happy with your drawing, go over it in pen or a dark pencil so it’s easier to see. Erase any remaining pencil lines, and enjoy your handiwork!
How Do You Draw a Cute Squirrel?
Assuming you would like tips on how to draw a cute squirrel, here are some helpful instructions: Begin by sketching the basic outline of the squirrel’s head and body. Next, add the details of the face, including the nose, eyes, and mouth.
Then move on to adding fur all over the squirrel’s body. To make your squirrel look extra cute, you can add accessories like a bow or flowers. Finally, color your drawing using browns and whites for a realistic effect.
How Do You Draw a Fly for Kids?
Assuming you would like tips on teaching kids how to draw a fly: One way to start is by having them sketch out the basic shape of the fly. This can be done by drawing an oval for the body and two small circles for the eyes.
Once the basic shape is complete, they can add details like wings, legs, and antennae. To make things easy, you can print out a template of a fly beforehand or use one from an online search. If your child struggles with getting the proportions right, try breaking the fly down into smaller sections.
For example, focus on drawing just the head first, then move on to the body and finally add in the legs and wings. Encouraging them to take their time and not worry about making mistakes will help them relax and produce better drawings.
How Do You Draw a Cute Squirrel for Kids?
Assuming you would like a step-by-step guide on how to draw a cute squirrel for kids:
Step 1: Start by drawing the head. For the head, draw a small circle with two pointy ears on top.
Step 2: Add the body by drawing a giant circle below the head. The body should be about twice the size of the head. Then, pull a big fluffy tail from the body’s backside.
Step 3: To finish up, add two tiny eyes and an even tinier nose to the face. Don’t forget to give your squirrel some cute little whiskers!
How to Draw a Flying Squirrel Realistic
In this tutorial, we’ll learn how to draw a flying squirrel that looks realistic and cute! We’ll start by sketching out the basic shape of the body. Next, we’ll add details like the eyes, nose, and mouth.
Finally, we’ll give our flying squirrel some fur and wings. By following these simple steps, you’ll be able to draw your flying squirrel in no time!
How 2 Draw a Dog
Assuming you would like a blog post about how to draw a dog: “How to Draw a Dog” Many people love dogs, so it’s no surprise that many want to learn how to remove them.
While every artist has their way of drawing animals, there are some general tips and tricks to create a cute canine picture. Here’s how to draw a dog step by step! Start by sketching out the basic shape of the head and body.
You can make the head oval-shaped or round, depending on the breed of dog you’re drawing. Then, add two small circles for the eyes and an upside-down triangle for the nose. Next, draw in the ears – they should be pointy at the top and floppy at the bottom.
Now it’s time to start fleshing out your drawing with details. For instance, give your pup some fur by adding short, curved lines all over its body. Make sure to include a wagging tail!
You can also add shading to give your drawing more dimension and realism. Finally, erase any stray pencil marks so your final product looks neat. With these steps in mind, try sketching out a few dogs yourself!
Be patient when learning how to draw – practice makes perfect!
Conclusion
Assuming you would like a summary of the blog post titled “How to Draw a Flying Squirrel,”: The blog post starts by talking about how flying squirrels are one of the most popular animals to draw. It then goes into step-by-step instructions on how to draw a flying squirrel, starting with the head and working down to the body.
The author also provides helpful tips along the way, such as using light and dark shading to create depth and dimension in the drawing. Following these simple steps, anyone can learn how to draw a flying squirrel.